I sit in front of this computer way too much. I know what you're thinking. "Why don't you post more often then?!?" I know, I know... But my point is that I need to spend LESS time in front of this box. So I was going to start setting my kitchen timer for 15 minutes at a time to remind me to get up and do stuff. We have THREE kitchen timers. Two of them are really nifty...they have magnets so they'll stick to the fridge, and little stands in the back so that you can stand them up and watch the time, and all kinds of nifty features. Do you think either one of these were ON the fridge? Nope. Neither was the regular kitchen timer on the shelf, where it belongs. I know, nice, right? Ugh!
But I'm determined to set some kind of alarm. I hate using the timer on the stove (I don't know why), the one on my phone is annoying and my hearing isn't good enough to use the one in my bedroom. So, I decided to look online to see if I could find some kind of alarm. Viola! Here it is, an online alarm clock! It even has different ringers. I personally prefer the guitar. :-D
Showing posts with label cooking. Show all posts
Showing posts with label cooking. Show all posts
Tuesday, November 3, 2009
Monday, October 26, 2009
Delicious Black Bean Stew
I threw this stew together the other night, and I'm in love. Remember Steup? Well, this is kind of the same concept, but a bit heartier, and with lots of different flavors. It's going to seem like there are a LOT of ingredients in this stew, but there are really only a few main ingredients...the rest was just a bunch of stuff I had hanging around (which was how I came up with this stew in the first place, just trying to use up the perishable food I knew would go bad if I didn't do something fast). The main ingredients are black beans, tomato, taco seasoning, and some type of grain. Once you have those ingredients, just throw in what you have available.
I made this stew twice (once for dinner, and once to freeze and eat later), and I had different ingredients each time, so I'll tell you about both versions. One thing's for sure...this is not a recipe for those who have to stick to a recipe! Be creative and have fun with it!
Black Bean Stew
Black beans - 1 pound for a medium crock pot, 2 pounds for a large crock pot - soaked overnight
"Grandma's Grain" or barley, or whatever you have on hand
Tomatoes - I used at least 10 tomatoes in each batch. You can probably use canned stewed tomatoes or whatever you have available.
Taco Seasoning - 1 packet for a medium crock pot, 2 packets for a large crock pot
Additional stuff:
Dried veggie soup mix
Carrots
Onions
Bouillon cubes (about 5 - if you want a vegetarian soup, use veggie bouillon)
Parsley
Garlic (in one batch, I used whole cloves of garlic, and in the other batch, granulated garlic)
Bell Peppers (I didn't have these for the first batch)
For my next batch, I plan to use pumpkin. I wish I had a big get-together planned sometime soon, because I have a great big pumpkin that I could use to serve my black bean soup in! Here's what I really want to do:

Disclaimer: This isn't my soup. I stole this picture from a friend who served this soup at a pumpkin carving party the other day.
And here's how I put it together (this is the second batch I made):
I gathered up all my veggies
 Soaked the beans overnight, then rinsed and drained them

Gathered my spices

Dumped in about a half a jar of my Grandma's Grains
 Cut up my veggies - bell peppers
 tomatoes
 carrots
 aaaand onions.
 And then I mixed it all together, and added water just to the point where you could tell I added water:
 (Isn't it gorgeous?) And then cooked it all day, and here's the result:
 Delicious!
I made this stew twice (once for dinner, and once to freeze and eat later), and I had different ingredients each time, so I'll tell you about both versions. One thing's for sure...this is not a recipe for those who have to stick to a recipe! Be creative and have fun with it!
Black Bean Stew
Black beans - 1 pound for a medium crock pot, 2 pounds for a large crock pot - soaked overnight
"Grandma's Grain" or barley, or whatever you have on hand
Tomatoes - I used at least 10 tomatoes in each batch. You can probably use canned stewed tomatoes or whatever you have available.
Taco Seasoning - 1 packet for a medium crock pot, 2 packets for a large crock pot
Additional stuff:
Dried veggie soup mix
Carrots
Onions
Bouillon cubes (about 5 - if you want a vegetarian soup, use veggie bouillon)
Parsley
Garlic (in one batch, I used whole cloves of garlic, and in the other batch, granulated garlic)
Bell Peppers (I didn't have these for the first batch)
For my next batch, I plan to use pumpkin. I wish I had a big get-together planned sometime soon, because I have a great big pumpkin that I could use to serve my black bean soup in! Here's what I really want to do:

Disclaimer: This isn't my soup. I stole this picture from a friend who served this soup at a pumpkin carving party the other day.
And here's how I put it together (this is the second batch I made):
I gathered up all my veggies
 Soaked the beans overnight, then rinsed and drained them
Gathered my spices

Dumped in about a half a jar of my Grandma's Grains
 Cut up my veggies - bell peppers
 tomatoes
 carrots
 aaaand onions.
 And then I mixed it all together, and added water just to the point where you could tell I added water:
 (Isn't it gorgeous?) And then cooked it all day, and here's the result:
 Delicious!
Monday, August 17, 2009
Perfect Iced Coffee
I love iced coffee in the summer. It's super easy to put together, and yummy. I have a lot of fun with it. This is how I make my iced coffee.
 Now, y'all know I'm not a photographer, but even with my lacking skill, this picture is just sad. Please ignore my messy desk. I just want to share the coffee love. ;-)
Make a pot of coffee twice as strong as you normally like it.
Grab a pitcher or sun tea dispenser (I use a pitcher...I make my coffee in a french press, so it's the perfect size for my pitcher. If you use a coffee pot, a sun tea dispenser would probably work better). Put all your "goodies" into the pitcher. I use creamer, cocoa, coffee syrups, and/or extracts(my favorite is coconut).
Pour the hot coffee in and stir.
Then add a couple trays of ice and stir. Let this sit while you get glasses ready with more ice (or if you've got a bucket of ice for guests, just keep stirring the coffee until it's chilled). Pour your coffee, embellish with mint sprigs, or whatever you like (I use my crazy straws...heehee! I like to let out my inner child often).
Keep the extra coffee in the fridge. I don't usually share mine (it's a "cleaning day" treat for me), so the pitcher lasts all day.
Enjoy!
Monday, May 4, 2009
Biscuits!
So, I came home tonight and decided to do some actual cooking. As in, not the quickie stuff I've been doing lately. I had the opportunity to try the baking mix from this post. At first, I tried the baking mix using whole wheat flour...but it just didn't work out. So, I took the leftover baking mix, and mixed it with a new batch of baking mix that I made with white flour. So, without further ado...
BISCUITS
Spoon 2 cups of the baking mix into a bowl.

Make a well; add 1/2 c. cold milk, all at once. Working quickly, stir vigorously with a fork just until dough follows fork around the bowl - this should take 30-40 seconds. Turn dough onto a lightly floured board and knead gently for another half minute (about 10 folds) to remove stickiness.

Roll or pat dough out to 1/4 to 1/2 inch thick. Dip a 2-inch cutter or an inverted glass tumbler in flour; cut dough straight down - no twisting - to form biscuits.
(I decided to be a dork and use a cookie cutter to cut the biscuits...Jason picked a pumpkin shaped cookie cutter.)

For soft biscuits, place dough rounds close together in a shallow, ungreased baking pan; for crusty biscuits, place the rounds 3/4 inch apart on a cookie sheet. Prick biscuit tops with a fork. If you wish, brush tops with milk or melted butter. Bake in an oven preheated to 450F for 10-15 minutes. Makes about 12 biscuits.

Yep, the half white, half wheat flour combo is very yummy.
Friday, April 24, 2009
Homemade Baking Mixes
I borrowed this book from my co-worker awhile back...I forget what it was called, but she's had this book for 25 years, and it is absolutely the most awesome book I've ever seen (ok, there are others just as awesome, but maybe this is the most awesome cook-type-book). It's a huge book full of recipes for making your own groceries at home. I'll probably post various things from it from time to time, but for today, I decided to post the baking mixes section (wish I had the stupid power cord for my scanner, I'd just scan the pages and post the picture...oh well).
BISCUIT AND BAKING MIX (like Bisquick)
8 3/4 cups flour (I used wheat flour, but wouldn't recommend it...maybe half white and half wheat, but don't use all wheat, k? Just not good...)
1/3 cup baking powder
1/4 cup sugar
1 tbsp. salt
2 cups vegetable shortening
In a very large mixing bowl, sift together the flour, baking powder, sugar, and salt. Use a pastry blender, or two knives, or your fingertips to cut in the shortening, 1 cup at a time, until the mix looks like coarse meal. Put in a covered container or plastic bag. Store at room temperature for about 3 months. For longer storage, place in freezer. To measure mix for use, lightly spoon it into a measuring cup; do not pack; level with a spatula.
BISCUITS
Spoon 2 cups of the above mix into a bowl. Make a well; add 1/2 c. cold milk, all at once. Working quickly, stir vigorously with a fork just until dough follows fork around the bowl - this should take 30-40 seconds. Turn dough onto a lightly floured board and knead gently for another half minute (about 10 folds) to remove stickiness. Roll or pat dough out to 1/4 to 1/2 inch thick. Dip a 2-inch cutter or an inverted glass tumbler in flour; cut dough straight down - no twisting - to form biscuits.
For soft biscuits, place dough rounds close together in a shallow, ungreased baking pan; for crusty biscuits, place the rounds 3/4 inch apart on a cookie sheet. Prick biscuit tops with a fork. If you wish, brush tops with milk or melted butter. Bake in an oven preheated to 450F for 10-15 minutes. Makes about 12 biscuits.
DROP BISCUITS
Increase milk to 2/3 cup. Do not knead. Drop dough from a teaspoon onto a well-greased cookie sheet. Bake as directed.
CHEESE BISCUITS
Add 1/3 cup grated cheese, any flavor, to dough.
ONION BISCUITS
Add 1/4 cup chopped, sauteed onions to dough.
HAM-BACON BISCUITS
Add 1/3 cup crisp bacon bits or 1/4 cup very finely chopped cooked ham to dough.
PANCAKES
In a mixing bowl, combine 1 1/3 cups milk and 1 egg. Add 2 cups of lightly spooned baking mix; beat smooth with an egg beater. If you wish, fold in 1/2 cup blueberries or 3/4 cup sliced apples. Drop mixture in 1/4 cup measurements onto a hot, lightly greased griddle. Makes 10 4-inch pancakes.
SHORTCAKES
Use a fork to lightly beat 1 egg in a mixing bowl; add 1/2 cup milk, 3 tablespoons sugar, and 3 cups of lightly spooned baking mix. Stir quickly with a fork to moisten, about 30 strokes. Turn onto a floured surface and knead well, 8 times. Roll out dough 1/2 inch thick. Using a floured cutter or inverted glass tumbler, cut dough into an equal amount of 2 1/2- and 3-inch rounds. Brush a larger round with melted butter and place a smaller one on top of it. Repeat until you have 5 or 6 double shortcakes. Place on an ungreased cookie sheet, gently prick tops with a fork; butter them if you wish. Bake in a preheated 425F oven for 12-15 minutes.
QUICK MEAT OR CHICKEN PIE
Pour 4 servings of canned or homemade beef or chicken stew into a buttered casserole dish; bake at 425F for about 10 minutes. Spoon 1 cup of baking mix into a bowl, make a well, and, all at once, pour in 1/3 cup of milk. Stir vigorously with a fork until moistened. Drop by teaspoonfuls on top of the heated stew. Bake 20-25 minutes more, then serve.
Thursday, April 23, 2009
Productivity
These days, productivity is rare for me. I've had some fairly major back pain issues for the last few years. I refuse to take medication for it unless I absolutely need it because when my pain is dulled, I can't tell how bad it is, and I continue to put more and more strain on my back, which just makes it worse.
Also, I've had some minor depression issues all my life, and I've been in "that" mode for a few months (maybe the winter weather affected me more than I thought it did). So, it has been increasingly difficult to have those productive days.
I have often sat and wistfully dreamed of the days when I could clean my whole house in one day...now I can't mop the floors. Or the days when I could make it to the top of Pilot Butte...I couldn't even make it from the parking lot to the foot of the Butte these days. I dream of the day (some distant, foggy day far in the future) when I might be able to do these things again.
Yes...I dream of mopping and hiking...two things I loathe, to be truthful, but I'd like to have the OPTION to do those things.
So, yesterday was a bit of a shock to me. I spent almost the entire day being productive. What changed, you ask? Well, my back has been hurting non-stop for days. It didn't matter if I was sitting, standing, bending, scrubbing...it just HURT. So I thought, well, if it's going to hurt no matter what I do, I may as well just suck it up and get moving. I felt like I had been run over by a tank by the time I fell into bed last night, but I was proud of myself in a way that I haven't been in over a year. This list may look puny to those of you who lead less sedentary lives, but allow me my pride...here's what I got done yesterday:
I rode on my "new" exercise bike...granted it was only a few minutes, but a few minutes is better than zero minutes.
I cleaned the entire kitchen, aside from the floor. It needed it, too. The sink is empty of the 4 days of dishes that had built up, the faucet and porcelain have been shined, counters cleaned (except a few spots), stove scrubbed. I cleaned and cured all my frying pans, AND my teapot (can anyone tell me how on Earth that thing gets so filthy every week? It's covered in grime an inch thick, and all I use it for is water! I think I need to store it on the other side of the kitchen...it picks up too much grease from cooking).
Oh yeah, and I actually cleaned the kitchen three times. Once for the big mess, and twice more after cooking and making a mess. It had better stay clean, I tell ya! (Had a little chat with hubs, and myself, to say that dishes are to be washed and promptly put in the dishwasher, not built up over days, and if you're going to cook for yourself, you're going to wash up your own dishes and clean up after yourself...I'm worse at this than he is, so I gave myself a much sterner talking to...heehee.)
I did all the laundry, which is huge. In the last few weeks, I've been getting most of the laundry done on Wednesday...to the point where I just have one last load in the dryer, and I just have to fold that and put everything away...and then I peter out. Well, last night, I didn't peter out (or, more accurately, I was already petered out by the time I woke up yesterday, so I just sucked it up and did it anyway). I even washed my blankets, since they were getting too heavy and warm. Hopefully that wasn't a mistake, since the weather is now cooled off again.
I cleaned the bathroom...counter, litter box, toilet (easy peasy, since I do the "swish" part of Flylady's swish and swipe at least every other day, so it wasn't that dirty to begin with), and the floor.
Organized cupboards, fridge, freezer, and a bunch of other stuff
Made bread
Made fudge
Wrote two blog posts...one about previously mentioned fudge, and one about cleaning supplies (which had to be edited about 15 times because I kept messing up...jeez).
Seems like there's more, but if I think of anything, I'll come back and add. I think that's enough bragging for now anyway. ;-)
Know what the best part is, though? That doesn't leave me a lot to do this weekend. Might have to find something fun to do with my spare time...
Wednesday, April 22, 2009
Easiest Fudge In The World
I have my mother in law to thank for this recipe. It's awesome. All you need is a bag of chocolate chips, a can of sweetened condensed milk, a double boiler or something similar, and a pan to put the finished fudge in.

Now, being domestic doesn't come easily to me. I've always had to work at it. Not that I don't love my domesticity...I'm just not a natural. So, just in case someone like me runs across this blog, I'm going to show every single step...even how to use a double boiler. Besides, this post would be so short if I didn't explain every step. This recipe is insanely easy.
So, step 1, fill the pot 1/2 to 3/4 full of water.

Then, put the double boiler (or another pan, whatever you've got handy) in the first pan, making sure the double boiler is sitting in the water, but the water isn't spilling out of the pan.

Dump in the chocolate and the milk.

Turn on the heat, and in a couple minutes, your chocolate will start to melt.

Give it a good stir every minute or so. It takes maybe 10 minutes to melt it all together.

When it's all melted, pour it into a pan to cool.

Put it in the fridge, and you'll have some delicious fudge in a half hour or so. I like to embellish it when I have stuff...add nuts, marshmallows, butterscotch chips, whatever tickles your fancy. This time, we're just having plan ol' fudge. Enjoy!
Monday, April 20, 2009
Menu Planning Again
Oh, this saving money thing completely rocks. In case anyone's wondering, I don't make my menus on a set schedule. Generally, I wait until payday, after paying bills (so that I know if my budget is off), and then whenever I have time. Well, I had the time today. (I only worked 1 hour today, and I worked from home). This time, I'm going to show you my menu and my shopping list. I only planned 28 meals this time because I ran out of ideas. But it won't matter, we'll have plenty. Also, we were out of town quite a bit and Jason is now working nights, so a lot of the food I planned for last month never got cooked. About half the menu is being carried over from last month as a result. Without further ado:
KABOB'S
Stew meat (have)
Mushrooms
Peppers
Onions (have)
Tomato
CHICKEN ALFREDO
Sauce Mix (I looked up a recipe for making my own sauce mix)
Pasta (have plenty, but I'm buying more with double coupons at Albertson's today, making them free)
Chicken (have)
Veggies (I just put random veggies with this meal, whatever sounds good...we have some frozen veggies from when the Steam Fresh veggies were on sale, and I got them for 50 cents each)
ALFREDO SAUCE MIX PACKETS
Dry milk (have)
Parmesan
Dried onion (have)
Garlic powder (have)
Salt (have)
White pepper
SPAGHETTI
Pasta (have)
Sauce mix packet (have)
Tomato Paste (have one but will need 3 more)
Meatballs (we have some of these, and might be able to get more free...if I can't get them free, we'll do without)
Veggies (have)
CHICKEN CURRY
Chicken (have)
Curry (have)
Coconut milk (have one can, need one more)
Rice noodles (have)
Spring rolls (we like a certain kind of veggie spring rolls...we have 2 boxes, but will need more)
Oriental veggies (we have enough for one meal, but we'll need more)
Soy sauce (have)
ENCHILADAS (have a meal kit)
Beans (have, will make a big pot of refried beans)
Cheese
Sour cream (have)
Veggies (have)
CHICKEN STRIPS AND FRIES
Chicken (have)
Potatoes
Bread crumbs (have)
Condiments (have)
CHILI AND CORNBREAD
Kidney beans (have)
Dried veggies (have WAY too much)
Chili Seasoning (if we don't have a packet, we have the spices)
Onion (have)
Diced tomatoes (have)
Cornmeal (have)
RAVIOLI
Frozen pasta (have)
Spaghetti or Alfredo sauce (whatever I'm in the mood for, and we have on hand...we have plenty of both)
BURGERS
Patties (have veggie burgers)
Buns
Condiments (have)
Lettuce, tomato, onion (have onion)
TUNA CASSEROLE
Pasta (have)
Tuna (have)
Cream mushroom soup (have)
Peas
CORN CHOWDER
Potato soup (have)
Corn (have)
Evaporated milk (have)
SOUP AND SALAD
Tomato soup (have)
Salad (we have some, but we'll need to grab more whenever we want this meal)
Dressing (have some, but will need more)
Crackers
CHOW MEIN
Chow Mein noodles (have)
Rice (have)
Bean sprouts (have)
Soy sauce (have)
Chicken (have)
Veggies
Sauce packet (have)
Spring rolls
MEATLOAF AND POTATOES
Ground turkey (have)
Ketchup (have)
Bread crumbs (have)
Egg (have)
BBQ sauce (have some, might need more)
Onion soup mix (have)
We'll be having multiples of a lot of those, so it adds up to 28 meals total. Here's the grocery list I have so far:
Fresh mushrooms
Bell peppers
Tomatos
Parmesan
White pepper
Cheese
Potatoes
Ranch dressing
Burger buns
Peas
Spring rolls
Oriental veggies
Crackers
That's it. For the whole month. I haven't looked through my master list yet, so I'm sure I'll add a few things, but I'm pretty well stocked up on the regular items. Did you see how much stuff I already have on hand??? Wowza. And that's not even including canned fruits and veggies, snacks, etc. I rearranged the cupboard this afternoon to make more room, and holy cow we have a lot of food. Time to add some shelves!
Saturday, April 18, 2009
Chili Rerun
Still whittling down those huge posts. I think this is the last one, but I'll have to check.
Ok, now on to the chili. Since I messed around with this recipe so much, I'm not going to put the actual recipe up, I'm just going to explain what I did. I soaked enough beans last night to make both recipes (the other was Cabbage Steup), so I threw in the beans, dried veggies (the ones I'm using up), a packet of chili seasoning (or you can use cumin, pepper, chili powder, and salt), and one onion before my first picture was taken:
 Then I added 2 cans of diced tomatoes:
 And some water (about a cup, give or take), mixed it all up, and set it to cook, too (should cook for 6-8 hours):
 This recipe could easily be doubled even in my little crock pot...I just keep forgetting to actually do it.
I forgot to mention, we're "mostly" vegetarian, so instead of ground beef, I'll be adding TVP to the chili later on. You can add ground beef or whatever meat you want to this. The recipe I used that had ground beef in it was not for the crock pot, so I don't know whether you should add raw ground beef at the beginning, or cook it separately and add it at the end.
Thanks to Casey for letting me know I need to explain what TVP (Textured Vegetable Protein) is. Have you ever seen those "veggie crumbles" in the grocery store freezer section? Morningstar farms has them in a green bag. They are YUMMY! And they are made from TVP. But you can also buy TVP in the bulk section and flavor it yourself.
The chili is done! Yippee! We decided to have the chili over baked potatoes with some cheese, and it is GOOOOOOOD. Funny, though...I forgot to add the TVP...oh well, it's still delish!

Cabbage Steup Rerun
Continuing on with the whittling down of enormous posts, I'm breaking down my Crock Pot post into the two recipes I blogged about.
Cabbage Steup (it's kinda like stew, and kinda like soup...)
32 oz. vegetable broth (or chicken broth)
1 medium or large cabbage, chopped
2 - 28 oz cans or 1 - 56 oz can of chunky tomato sauce
28 oz water
14 oz can kidney beans, drained
1 can sliced carrots, drained
1 can whole kernel corn, drained
1 can cut green beans, drained
1 6 oz. can tomato paste
Optional ingredients:
3-4 chicken breasts
3-4 medium/large potatoes
Add broth, cabbage, tomato sauce, and water to a large crock pot (you need the biggest crock pot possible - I think mine is 6 qt. - or two smaller crock pots) (add potatoes and chicken at this time, too). Cook in crock pot until cabbage is 3/4 cooked (looks somewhat transparent). Add remaining ingredients and salt, pepper, garlic, and bay leaves and cook for another 1-2 hours or until cabbage is soft (and chicken and potatoes are cooked).
Now, I personally do it a little differently. I apologize that I didn't get pictures from the beginning, but I didn't think about it until I already had a few ingredients in the pot. So, here's what I did. First, I prefer to not use canned stuff if I don't have to, so I soaked some dry kidney beans over night, and put a couple cups (give or take) in the crock pot. I also have this enormous stockpile of dried vegetables that I like to throw in everything so that I can use it up. I also add an onion. So, here's the cabbage steup that far, along with the first half of the cabbage:
 Now it may not look like there's a lot of cabbage in there, but when you add in the second half, it nearly fills up the crock:
 I also add raw carrots at the beginning instead of canned (and I'd put in raw corn and green beans, too, if I had them):
 And of course, I didn't have tomato sauce (I could have sworn we had a couple cans, but whatever), so I just used 2 cans of diced tomatoes and 2 cans of tomato paste:
 I also didn't have any broth, so I used vegetable bouillon cubes and added some water. So, once everything is in the crock, mix it up as well as you can without spilling stuff all over (because at this point, it's VERY full), and set it to cook:

Aaaaaaaaand, here's the finished steup! I haven't broken it down yet, but it will make at least six meals.
 We ended up adding noodles to it this time. Very yummy.
Cabbage Steup (it's kinda like stew, and kinda like soup...)
32 oz. vegetable broth (or chicken broth)
1 medium or large cabbage, chopped
2 - 28 oz cans or 1 - 56 oz can of chunky tomato sauce
28 oz water
14 oz can kidney beans, drained
1 can sliced carrots, drained
1 can whole kernel corn, drained
1 can cut green beans, drained
1 6 oz. can tomato paste
Optional ingredients:
3-4 chicken breasts
3-4 medium/large potatoes
Add broth, cabbage, tomato sauce, and water to a large crock pot (you need the biggest crock pot possible - I think mine is 6 qt. - or two smaller crock pots) (add potatoes and chicken at this time, too). Cook in crock pot until cabbage is 3/4 cooked (looks somewhat transparent). Add remaining ingredients and salt, pepper, garlic, and bay leaves and cook for another 1-2 hours or until cabbage is soft (and chicken and potatoes are cooked).
Now, I personally do it a little differently. I apologize that I didn't get pictures from the beginning, but I didn't think about it until I already had a few ingredients in the pot. So, here's what I did. First, I prefer to not use canned stuff if I don't have to, so I soaked some dry kidney beans over night, and put a couple cups (give or take) in the crock pot. I also have this enormous stockpile of dried vegetables that I like to throw in everything so that I can use it up. I also add an onion. So, here's the cabbage steup that far, along with the first half of the cabbage:
 Now it may not look like there's a lot of cabbage in there, but when you add in the second half, it nearly fills up the crock:
 I also add raw carrots at the beginning instead of canned (and I'd put in raw corn and green beans, too, if I had them):
 And of course, I didn't have tomato sauce (I could have sworn we had a couple cans, but whatever), so I just used 2 cans of diced tomatoes and 2 cans of tomato paste:
 I also didn't have any broth, so I used vegetable bouillon cubes and added some water. So, once everything is in the crock, mix it up as well as you can without spilling stuff all over (because at this point, it's VERY full), and set it to cook:
Aaaaaaaaand, here's the finished steup! I haven't broken it down yet, but it will make at least six meals.
 We ended up adding noodles to it this time. Very yummy.
Friday, April 17, 2009
Vanilla Syrup Rerun
This recipe is from the same post as the Pumpkin Bread.
Aaaaaand, last but not least (and not the least of what I did today), I made vanilla syrup! My mother in law gave me these bottles of syrup that I've been using in my coffee. I knew that once they were gone, I was going to miss them terribly. My coffee has been so yummy lately! So, I looked up how to make syrup. I'm not a big sugar fan, though, so we have no sugar in our house. I wondered if I could make it with splenda? I have heard bad things about splenda, but we have tons of it, so why not use it up, eh? So, I made the syrup just like I would with sugar...twice as much splenda as water, in a pan. The splenda completely dissolved in the water without even heating it. But it seemed rather thin, and had a funky after taste. So I decided to try adding some vegetable glycerine, which is very sweet. It didn't make it any thicker, but it helped with the after taste. I used my homemade vanilla extract (2 tsp), boiled the syrup for a couple minutes to burn off the alcohol, and it is FABULOUS! Sooo much better than the storebought stuff! Here's the finished product:
 Cheap, easy, SUPER yummy, and easy to store in the bottles I already had. I like that. :-)
After having used this syrup a few times, I'm finding that it still has a funky aftertaste. Not bad, per se, just...not the same as regular vanilla syrup. I might experiment with other sweeteners besides splenda, but until I do, I'd have to recommend using plain ol' sugar for this recipe.
Pumpkin Bread Rerun
I wrote a few posts awhile back that were rather cluttered, with multiple topics. I've decided to spread them out into separate posts to make them more easily searchable. So, here's the pumpkin bread recipe from this post.
Ok, now to something a bit yummier. I made pumpkin bread today! Now, I mentioned a long time ago that I like to make jars of stuff to give people every year. The pumpkin bread was from one of those jars. I love the leftovers as much as I love the gifts! They always come in handy, and give me lots of new recipes to use. Sometimes, I'll make up extra jars during the year so that I'll have quick, easy recipes on hand. Here's a picture of the first jars I ever put together:
 This one was green and yellow split pea soup. Super easy, super cheap, and makes a HUGE pot of soup. Anyway, I've had these jars of pumpkin bread in the cupboard for awhile, and the only time I ever make it is around Harvest time, if I'm assigned cakes and ale for a ritual...which...well...hasn't happened in a long while, beings that I'm very super duper extra solitary right now. Which means, I haven't made pumpkin bread in ages. I've had the jar sitting on the counter for a week, so I FINALLY went for it today! Here's the recipe:
Quick Pumpkin Bread
2 c. all-purpose flour
1 c. packed light brown sugar
1/2 c. raisins
1/2 c. chopped pecans or walnuts
1 1/2 tsp. pumpkin pie spice
1 tsp. baking soda
1/2 tsp. baking powder
1/2 tsp. salt
1. Layer ingredients attractively in any order in 1-quart food storage jar with tight-fitting lid. Pack ingredients down slightly before adding another layer.
2. If gifting (or if desired), cover top of jar with fabric, attach recipe tag with raffia or ribbon.
Recipe Tag:
1/3 cup butter, softened
2 eggs
1 c. canned pumpkin (I save and freeze my leftover Samhain pumpkin ever year, just for this recipe)
1 jar Quick Pumpkin Bread Mix
1. Preheat oven to 350 F. Spray 8 1/2 x 4 1/2 inch loaf pan with nonstick cooking spray (I didn't have any...used olive oil, worked fine).
2. Beat butter in large bowl with electric mixer until creamy. Add eggs, one at a time, beating well after each addition. Beat in pumpkin until well blended. Add contents of jar; stir just until blended. Pour into prepared pan.
3. Bake 50-55 minutes or until toothpick inserted into center comes out clean (mine took 65 minutes, but I had too much liquid in my bread...it came out fine, though). Cool in pan on wire rack 15 minutes. Remove from pan and cool completely on wire rack. Makes 1 loaf.
And here is the finished product:

Thursday, April 16, 2009
Easy Bakeware
Have you been getting the Easy Bakewear pans for free? I don't know how to do banner links, but this blog has a banner right up at the top that will take you to the web site. So far, I've ordered two pans. I've recieved one of them, and it's quite nifty. But that's not why I'm blogging about this.
BUYER BEWARE!!!
You'll get your free bakeware all right...but you'll also get a bill for $14.95 for something else. If you're the type, like me, who trusts that everything is as good as it looks, you might want to put that whole trust thing on hold for a few minutes. When you sign up for the $1 shipping, a bunch of stuff pops up that tells you that if you sign up for the $1 shipping (effectively making your bakewear $1, which is a screamin' deal), you are agreeing to sign up for some worthless thing that does nothing for you, for which you will be charged monthly, blah blah. You have 7 days to cancel your membership. So, if you do order one of their pans, I'd recommend putting in your order and going right straight to the phone to cancel the worthless whatever you call it thing that charges you for nothing.
What? I'm not angry. Why would you think that? I'm totally fine about the fact that I only have a few bucks til payday, the radiator hose is busted, I had to buy gas this morning, and now I get to worry about the bank balance dropping below zero, resulting in $30 in overdraft fees because businesses don't give a crap about the little guy, and will gouge you any way they can JUST because they can get away with it. I'm not angry at all. See this GREAT BIG SMILE on my face??? I'm fine, I tell you! Now shut up and leave me alone!
Wednesday, March 25, 2009
My Interview With Domestic Witch
This is a copy of my interview over at the Domestic Witch blog.
Five minutes with Joy
 Domestic Witch is happy to present an interview with Joy, who woke up with this wacky hair-do on the morning of her interview and knew the day was going to be.....different.
When I was little, my mom taught me. But she was pretty mean about it, and had zero patience. As a result, my crocheting sucked, to say the least, and it was nothing but frustrating for me. I did it for maybe a few months. Then, about 5 years ago, I decided I wanted to pick it up again. I bought a book, some hooks and yarn, and went for it.

So, I guess I just plan to talk about it a lot. I talk to people about it in real life, too, as often as I can. I wrote a letter to the editor of my local newspaper yesterday. I write letters to state legislators and others. I just do whatever I can. I'm lucky to live in one of the few states that does have open records, but the rest of the states need to follow suit, so I'm going to keep working until all states are open.
How do you and your husband balance homekeeping?
I LOOOOVE Easter candy (again, Easter? Ostara? Well, there's a compromise for that one, I've seen Eostra a few times). The malted milk eggs (which weren't as good this year, for some reason) are always a favorite. Cadbury eggs. Yuum! I love corned beef and cabbage, but I've never really associated it with Spring until recently (I don't pay much attention). I'm so looking forward to that recipe!
Five minutes with Joy
 Domestic Witch is happy to present an interview with Joy, who woke up with this wacky hair-do on the morning of her interview and knew the day was going to be.....different.
What is your most established crock pot recipe?
Oh, I wish I had pictures. This one's yummy. It's from the book Fix It And Forget It Lightly on page 25
Slow-Cooked Chicken & Mushroom Stew (5 weight watcher points per serving)
Makes 4 servings (Ideal slow cooker size: 4-5 qt.)1 can of 98% fat free cream of mushroom soup
half a can of water4 boneless, skinless chicken breast halves
1/2 tsp. salt1/4 tsp. pepper
1/2 lb. fresh medium-sized white mushrooms, or a variety of mushrooms, cut up1 cup baby carrots
2 ribs celery, cut into small pieces1/2 tsp. garlic powder
Combine soup and water in slow cooker. Cut chicken into 2" chunks. Sprinkle with salt and pepper. Place in slow cooker. Add mushrooms, carrots, celery, and garlic powder. Stir gently to mix. Cover and cook on low 6-8 hours or until chicken is done and internal temperature reaches 170. Serve with rice.If you like mushrooms, this recipe is TO DIE FOR!
I loved the red and black dramatic afghan you crocheted, who taught you how to crochet?
When I was little, my mom taught me. But she was pretty mean about it, and had zero patience. As a result, my crocheting sucked, to say the least, and it was nothing but frustrating for me. I did it for maybe a few months. Then, about 5 years ago, I decided I wanted to pick it up again. I bought a book, some hooks and yarn, and went for it.
I worked in a residential treatment facility with teenage girls for awhile, and I thought it would be so cool to give them something like that to do. I made mass copies of the book, and handed them out (along with some cheap plastic hooks) to any girl who wanted them. I worked night shift, so I'd sit in the girls' doorways after bedtime helping them learn how to crochet.
Crocheting has absolutely been the most fulfilling activity I've picked up as an adult. :-)
I had not heard of Adoptee Rights before reading your blog, how do you hope to educate others like me in your cause?
I participate in other forums where it's a topic of conversation a lot. I get a lot of information from reading blogs and message boards where adoptees and their first parents (i.e. the preferred term for "birth" parents) talk about adoption from their point of view. Until now, I've stuck to learning, but I think it will be a fairly regular topic of my blog.
One of the forums I belong to, where I'm usually very vocal, there are a lot of new people who come and go, and I have spoken to probably thousands of people that way. Not all people listen...it can be really tough to hear that adoption is not all rainbows and sunshine, and that there are negative aspects, too. It was certainly a shock to me at first, beings that my husband and I were planning to adopt. But it was extremely important to me that I open my mind and make sure that I was doing all I possibly could to be a good parent. Now, my focus is on doing what I can to help my friends.
So, I guess I just plan to talk about it a lot. I talk to people about it in real life, too, as often as I can. I wrote a letter to the editor of my local newspaper yesterday. I write letters to state legislators and others. I just do whatever I can. I'm lucky to live in one of the few states that does have open records, but the rest of the states need to follow suit, so I'm going to keep working until all states are open.
How do you and your husband balance homekeeping?
This is a constant work in progress. We are both notorious procrastinators. I have a confession to make...we still have all our winter holiday decorations out. (I never know what to call Christmas/Yule because it's Christmas to him and Yule to me...maybe Yulemas? HAHA!) Yep, the little fiber-optic tree has fallen down, a lot of the ornaments have fallen on the floor, where the dogs have taken to chewing them up. The base that the tree sits on has fallen on the floor, which I realized yesterday. It's a sad sight. This has never happened before (normally, we just pile stuff up on the couches until you can't tell what all is under there, but we've never left the Yulemas decorations up until March before!).
We were doing pretty good for awhile there, using flylady. But man, this year, we have just dropped the ball. The few things we do have down pat are the "home blessing hour" (which Jason does), laundry (which I do), and paying bills (which we do together, or sometimes I do it if I have more time). Oh, and one person cooks while the other cleans up after. Otherwise...*blush*...we're working on it.
What Spring foods to you traditionally eat?
I LOOOOVE Easter candy (again, Easter? Ostara? Well, there's a compromise for that one, I've seen Eostra a few times). The malted milk eggs (which weren't as good this year, for some reason) are always a favorite. Cadbury eggs. Yuum! I love corned beef and cabbage, but I've never really associated it with Spring until recently (I don't pay much attention). I'm so looking forward to that recipe!
Monday, March 23, 2009
Menu Planning
I've mentioned Flylady a few times, I think. I'm sure I'll write a post eventually dedicated only to Flylady stuff, but this one is specifically about one part of my life that has changed as a direct result of becoming a Flybaby. I used to just write a general grocery list of the basics, not worrying about what I was going to make. I figured I had most of the ingredients to make a few good meals, and it usually worked out pretty well. Unfortunately, we'd end up running to the store quite often because we were still missing one or two ingredients. So, starting to plan my meals ahead of time has been awesome.
I actually started doing this after I saw Leanne Ely's Saving Dinner sample menu's, and realizing that would help me tremendously. I have a couple of menu's written up and saved in my documents, but it proved to be too much work to keep making those great big ol' lists over and over again, and I never wanted the same one twice (especially since I'm always experimenting with something, and if I try to add an experimental meal to the list and it turns out disgusting, I have to find something to replace it with...and it's just more trouble than it's worth).
So, I came up with a system half way in between the big, elaborate meal plan and the fly by the seat of my pants (and make a few extra runs to the grocery store in between shopping trips) systems. I'm going to walk you through my little system, just in case it helps. Actually, I'm going to walk you through what I did last time, since it changes a little every time, and I liked the most recent grocery shopping trip so much.
The first thing I did was peek around in the cupboards to see what we already have that could make meals we both like. For example, we have tons of leftover tuna and cream of mushroom soup, along with a few bags of pasta. Viola, quick and easy tuna casserole. We have plenty of kidney beans and some cornmeal. So, chili and cornbread would be a great meal to have. I went through like this, adding the name of each meal until I had 30 meals (but as I mentioned in my earlier post, I usually only do 14 meals).
For each meal, I then write down how much of each ingredient we need. It looks like this:
 Most of the meals are pretty self explanatory (for instance, we bought those taco meal kits that have everything in them except meat and produce, so I didn't break those out into ingredients). I usually only write down the ones where I'm changing the menu to conserve (like, corn chowder usually uses 2 cans of cream of potato soup and 2 cans of evaporated milk, but I figured we could cut it in half and have sandwiches with it this time). I wouldn't do this if I were the only one cooking, but if Jason decides to cook (like he did tonight...well, I kinda decided for him, but he could have said no), he needs to know what ingredients I planned for him to use. Sometimes he'll grab twice as much of an ingredient than he needs, and we don't have enough for another meal.
Anyway, I don't necessarily write down every ingredient for every meal, but I at least mentally make this list for each meal. While I'm doing this, I make my grocery list (I'd been working on it the whole time, actually, but this is the step where I double and triple check that I have everything on the list). Then I check my master grocery list (another flylady suggestion), and I'm done.
Before dinner that night, I make sure the list of ingredients, and a complete list of all the meals I have planned for that [month, bi-week, or week] are on the fridge. I'm pretty new still to the coupon thing, but so far, this is the part where I grab coupons, and I'll add any good coupons to my grocery list, and grab any coupons I think might come in handy while I'm out. Then I'm off to the store!
Sunday, March 22, 2009
New Goals (Budget)
I started using coupons way back when I was 19-ish, during my first marriage. I still remember the incredible rush when I saved over $150 on ONE grocery shopping trip! Due to the economy, having my hours cut back at work, and lots of other financial things all coming up at the same time, I decided to pick this old habit back up. I was hesitant to make goals like I've seen some others doing with their couponing and budgeting, because I was afraid that if I didn't meet my goals, I'd start feeling bad about myself (which happens easily for me, so I'm trying to learn to avoid my self-imposed feel-bad traps). But today, I made a grocery list and was SHOCKED!!!
I planned for 30 dinners (normally I only plan for 14, but wanted to see what I could get away with), along with breakfasts, lunches, and desserts (I made fudge the other day and was upset with myself for not sharing it on my blog...it's super easy! So, I'm going to buy the ingredients, make it again, and share it with y'all. Are you excited??? I am!!!). You might be shocked to find that after that many meals, this is my entire shopping list:
coffee creamer
coffee (anybody know any good deals on decaf?)
dog food
yeast (brewer's...love it on toast)
rubbing alcohol (gotta try this deodorant)
tums
spring rolls (which I have coupons for)
corn
mouthwash
chow mien noodles
bean sprouts
diced tomatoes
1 bag chocolate chips
1 can sweetened condensed milk
canned fruit
binder (for my flylady control journal...I'll have to post about that)
butter
frozen veggies
flour
vital wheat gluten
and IF I can find a good deal:
paper towels
toilet paper
cheese
That's it. For the entire month!!! Are you as psyched about that as I am? Ok maybe not, but I am PSYCHED, y'all! So, with my teeny weeny little grocery list as inspiration, I've decided to set myself a budget. I'm going to allow myself a maximum of $200 today. So, whatever I spend at Winco (the cheapest store), I'll subtract that from $200, and the rest I will use to get good deals at other stores and stock up. I'm going to bring some coupons with me that I think might come in handy, and we'll see what happens! I'll update this blog post when I'm done with my shopping today.
ETA: Oh, it was a joyous evening (no pun intended). First, I stopped at the shell station and put $25 in my car on a gift card I got for free from mypoints (if you would like to join mypoints, please leave me a comment with your name and email address, because I get extra points for referrals!). So, I got almost a full tank of gas for free. Then, I went to Winco (they're accepting internet coupons now! Yippee!) and spent $82.77 (saving $3.05...not great, but I didn't have coupons for hardly anything that I needed). Then, I went to Albertson's because they were having a sale on cheese (2 lbs. for $3.99), and bought 4 blocks of cheese, bringing my total for today up to $104.73 (I just now realized that they didn't give me the sale price on the last block of cheese, dangit! I'll have to make a run down to the store...might hit Fred's while I'm out). Anyway, so that leaves me with about half my budget to hit the sales for the week! Woohooo!
ETA2: Okey dokey, I just got back from Albertson's about the cheese, and I stopped in at Fred Meyer (and I'm glad I did!). When I went into Albertson's, the issue was that there was a limit of two. BUT, since the machine did give me the third block of cheese at sale price, he went ahead and gave me the fourth one at the sale price, too! So, I walked away with $6 in my pocket.
I went straight over to Fred Meyer intending to buy some of their MD bath tissue which is on sale for $4.99 (I had to hunt down the coupon, though). I peeked around at some of the other products I had coupons for and ended up spending a bit of money, but it was worth it. They had a deal where if you spend $25 on participating items, you'll get $10 off your next shopping trip. Well, the only participating item I'd use was tums, so I bought $25 worth of tums, lol! Then, I found that almost everything I had coupons for was on sale! I bought two dry idea roll ons for 2 for $5, and then used 2 coupons for $2 each, getting the dry idea for 50 cents each!
After this trip, my total for the day is $148.53. But I have $6 cash (which I forgot to apply toward my Fred Meyer purchase), and $10 off my next Fred's trip. So I'm pretty happy with that!
Tomorrow: Walgreens.
Wednesday, March 18, 2009
Onion and Pumpkin and Syrup, Oh My!
I had a fun day today, so I thought I'd share.
I have had this plantar wart on the bottom of my left foot for years. I've bought the over the counter crap. Doesn't work. It shrinks the wart, makes it ugly, makes it easy to slough off the top few layers...but it also creates a thick layer of skin that gets used to the chemicals, and forms a thick, protective barrier over the root of the wart. Great!
I went to the doctor in November to have it frozen off. The first appointment hurt like heck because they had to rip the skin off the top (that thick, protective layer of skin), and freeze the root of the wart with nitrogen. AND IT DIDN'T EVEN WORK! Stupid doctors. (No offense to any doctors that read this post...I've learned that there are things to go to the doctor for, and things to call my friends for...this is one thing I'm not ever going to waste money on doctors for again.) They told me I'd have to just keep coming in every couple weeks (at $25 a pop) until it was gone. I went back in one more time, but my insurance got messed up after the new year and I couldn't go back.
Not only did that damn wart grow to ridiculous proportions in the 2 month span since the last time I went in, it also SPAWNED! I ended up with about 20 little baby warts hanging around the Big Mama.
I have a friend who is an herbalist (*waves to Tamara!*). Quite some time ago, she told me about this gentle, Earth-friendly remedy for warts. I never tried it. I have to be honest...I'm lazy. I put that harsh chemical crap on my foot once a day for years...it was easy. I was getting into bed, and I'd just smear it on, and hop into bed. It provided a handy excuse for not getting out of bed when I forgot something...resulting in many, many trips to the bathroom, living room, and kitchen for Jason after he was all snuggled in for the night. *blush**bat eyelashes*
Now, it's not that this Earth-friendly remedy was really all that difficult or time consuming. I just couldn't figure out how to work it in. Let me explain. (It's so super simple, I can't even believe I put it off this long).
You take 2-3 onions and 2-3 lemons. Cut the onion in half, and remove just enough of the center of the onion to make a bowl (make sure the bottom is intact so it doesn't leak). Then, take a lemon, cut it in half, and squeeze the juice into the center of the onion. Put the onion on some tin foil in a muffin pan (just to keep it upright). Gather the tin foil over the top to seal in the juice. Cook on 350 for a couple hours until the onion is translucent. This is what comes out of the oven:
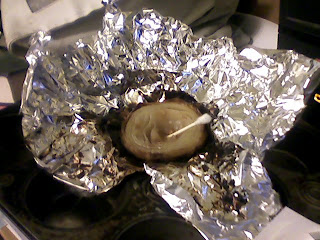 You just take a qtip and rub the juice on your wart whenever you think about it. Repeat every day until your onions and lemons are used up. Oh, and drink some anti-viral tea a couple times a day while you're doing this treatment (which reminds me, I'm going to go make myself a cup of licorice tea right now before I finish). Tamara says that for about 2 weeks after the treatment, you'll wonder if it worked...and then the wart will just slowly disappear. I'll let you know how it works out (I'm on day 4...I think...).
The thing I worried about (silly in retrospect) was how to do my job, and how to deal with other daily obligations if I'm supposed to be hanging around smearing stuff on my foot all day. I'd have to not wear socks or shoes, and I'd have to transport this smelly onion to work and back every day. I never have a four day weekend (and this wart has gotten so out of hand that I need a six day treatment, so I most certainly never get THAT many days off in a row). But it's easy actually. First of all, my hours were cut back at work, so I only work 3 days a week, and two of my work days are fairly short. I decided to skip the two short days (just using the onion while I'm home), and for just one day (Thursday), I'll bring it to work. It's staff meeting day anyway...nobody is going to smell it, except maybe one student. No sweat! And if I wear my crocs, I'll be able to slip my shoe on quickly if needed. Why did I put this off again?
Ok, now to something a bit yummier. I made pumpkin bread today! Now, I mentioned a long time ago that I like to make jars of stuff to give people ever year. The pumpkin bread was from one of those jars. I love the leftovers as much as I love the gifts! They always come in handy, and give me lots of new recipes to use. Sometimes, I'll make up extra jars during the year so that I'll have quick, easy recipes on hand. Here's a picture of the first jars I ever put together:
This one was green and yellow split pea soup. Super easy, super cheap, and makes a HUGE pot of soup. Anyway, I've had these jars of pumpkin bread in the cupboard for awhile, and the only time I ever make it is around Harvest time, if I'm asigned cakes and ale for a ritual...which...well...hasn't happened in a long while, beings that I'm very super duper extra solitary right now. Which means, I haven't made pumpkin bread in ages. I've had the jar sitting on the counter for a week, so I FINALLY went for it today! Here's the recipe:
Quick Pumpkin Bread
2 c. all-purpose flour
1 c. packed light brown sugar
1/2 c. raisins
1/2 c. chopped pecans or walnuts
1 1/2 tsp. pumpkin pie spice
1 tsp. baking soda
1/2 tsp. baking powder
1/2 tsp. salt
1. Layer ingredients attractively in any order in 1-quart food storage jar with tight-fitting lid. Pack ingredients down slightly before adding another layer.
2. If gifting (or if desired), cover top of jar with fabric, attach recipe tag with raffia or ribbon.
Recipe Tag:
1/3 cup butter, softened
2 eggs
1 c. canned pumpkin (I save and freeze my leftover Samhain pumpkin ever year, just for this recipe)
1 jar Quick Pumpkin Bread Mix
1. Preheat oven to 350 F. Spray 8 1/2 x 4 1/2 inch loaf pan with nonstick cooking spray (I didn't have any...used olive oil, worked fine).
2. Beat butter in large bowl with electric mixer until creamy. Add eggs, one at a time, beating well after each addition. Beat in pumpkin until well blended. Add contents of jar; stir just until blended. Pour into prepared pan.
3. Bake 50-55 minutes or until toothpick inserted into center comes out clean (mine took 65 minutes, but I had too much liquid in my bread...it came out fine, though). Cool in pan on wire rack 15 minutes. Remove from pan and cool completely on wire rack. Makes 1 loaf.
And here is the finished product:
Aaaaaand, last but not least (and not the least of what I did today), I made vanilla syrup! My mother in law gave me these bottles of syrup that I've been using in my coffee. I knew that once they were gone, I was going to miss them terribly. My coffee has been so yummy lately! So, I looked up how to make syrup. I'm not a big sugar fan, though, so we have no sugar in our house. I wondered if I could make it with splenda? I have heard bad things about splenda, but we have tons of it, so why not use it up, eh? So, I made the syrup just like I would with sugar...twice as much splenda as water, in a pan. The splenda completely dissolved in the water without even heating it. But it seemed rather thin, and had a funky after taste. So I decided to try adding some vegetable glycerine, which is very sweet. It didn't make it any thicker, but it helped with the after taste. I used my homemade vanilla extract (2 tsp), boiled the syrup for a couple minutes to burn off the alcohol, and it is FABULOUS! Sooo much better than the storebought stuff! Here's the finished product:
Cheap, easy, SUPER yummy, and easy to store in the bottles I already had. I like that. :-)
Have a great day, all!
I have had this plantar wart on the bottom of my left foot for years. I've bought the over the counter crap. Doesn't work. It shrinks the wart, makes it ugly, makes it easy to slough off the top few layers...but it also creates a thick layer of skin that gets used to the chemicals, and forms a thick, protective barrier over the root of the wart. Great!
I went to the doctor in November to have it frozen off. The first appointment hurt like heck because they had to rip the skin off the top (that thick, protective layer of skin), and freeze the root of the wart with nitrogen. AND IT DIDN'T EVEN WORK! Stupid doctors. (No offense to any doctors that read this post...I've learned that there are things to go to the doctor for, and things to call my friends for...this is one thing I'm not ever going to waste money on doctors for again.) They told me I'd have to just keep coming in every couple weeks (at $25 a pop) until it was gone. I went back in one more time, but my insurance got messed up after the new year and I couldn't go back.
Not only did that damn wart grow to ridiculous proportions in the 2 month span since the last time I went in, it also SPAWNED! I ended up with about 20 little baby warts hanging around the Big Mama.
I have a friend who is an herbalist (*waves to Tamara!*). Quite some time ago, she told me about this gentle, Earth-friendly remedy for warts. I never tried it. I have to be honest...I'm lazy. I put that harsh chemical crap on my foot once a day for years...it was easy. I was getting into bed, and I'd just smear it on, and hop into bed. It provided a handy excuse for not getting out of bed when I forgot something...resulting in many, many trips to the bathroom, living room, and kitchen for Jason after he was all snuggled in for the night. *blush**bat eyelashes*
Now, it's not that this Earth-friendly remedy was really all that difficult or time consuming. I just couldn't figure out how to work it in. Let me explain. (It's so super simple, I can't even believe I put it off this long).
You take 2-3 onions and 2-3 lemons. Cut the onion in half, and remove just enough of the center of the onion to make a bowl (make sure the bottom is intact so it doesn't leak). Then, take a lemon, cut it in half, and squeeze the juice into the center of the onion. Put the onion on some tin foil in a muffin pan (just to keep it upright). Gather the tin foil over the top to seal in the juice. Cook on 350 for a couple hours until the onion is translucent. This is what comes out of the oven:
 You just take a qtip and rub the juice on your wart whenever you think about it. Repeat every day until your onions and lemons are used up. Oh, and drink some anti-viral tea a couple times a day while you're doing this treatment (which reminds me, I'm going to go make myself a cup of licorice tea right now before I finish). Tamara says that for about 2 weeks after the treatment, you'll wonder if it worked...and then the wart will just slowly disappear. I'll let you know how it works out (I'm on day 4...I think...).
 The thing I worried about (silly in retrospect) was how to do my job, and how to deal with other daily obligations if I'm supposed to be hanging around smearing stuff on my foot all day. I'd have to not wear socks or shoes, and I'd have to transport this smelly onion to work and back every day. I never have a four day weekend (and this wart has gotten so out of hand that I need a six day treatment, so I most certainly never get THAT many days off in a row). But it's easy actually. First of all, my hours were cut back at work, so I only work 3 days a week, and two of my work days are fairly short. I decided to skip the two short days (just using the onion while I'm home), and for just one day (Thursday), I'll bring it to work. It's staff meeting day anyway...nobody is going to smell it, except maybe one student. No sweat! And if I wear my crocs, I'll be able to slip my shoe on quickly if needed. Why did I put this off again?
Ok, now to something a bit yummier. I made pumpkin bread today! Now, I mentioned a long time ago that I like to make jars of stuff to give people ever year. The pumpkin bread was from one of those jars. I love the leftovers as much as I love the gifts! They always come in handy, and give me lots of new recipes to use. Sometimes, I'll make up extra jars during the year so that I'll have quick, easy recipes on hand. Here's a picture of the first jars I ever put together:
This one was green and yellow split pea soup. Super easy, super cheap, and makes a HUGE pot of soup. Anyway, I've had these jars of pumpkin bread in the cupboard for awhile, and the only time I ever make it is around Harvest time, if I'm asigned cakes and ale for a ritual...which...well...hasn't happened in a long while, beings that I'm very super duper extra solitary right now. Which means, I haven't made pumpkin bread in ages. I've had the jar sitting on the counter for a week, so I FINALLY went for it today! Here's the recipe:Quick Pumpkin Bread
2 c. all-purpose flour
1 c. packed light brown sugar
1/2 c. raisins
1/2 c. chopped pecans or walnuts
1 1/2 tsp. pumpkin pie spice
1 tsp. baking soda
1/2 tsp. baking powder
1/2 tsp. salt
1. Layer ingredients attractively in any order in 1-quart food storage jar with tight-fitting lid. Pack ingredients down slightly before adding another layer.
2. If gifting (or if desired), cover top of jar with fabric, attach recipe tag with raffia or ribbon.
Recipe Tag:
1/3 cup butter, softened
2 eggs
1 c. canned pumpkin (I save and freeze my leftover Samhain pumpkin ever year, just for this recipe)
1 jar Quick Pumpkin Bread Mix
1. Preheat oven to 350 F. Spray 8 1/2 x 4 1/2 inch loaf pan with nonstick cooking spray (I didn't have any...used olive oil, worked fine).
2. Beat butter in large bowl with electric mixer until creamy. Add eggs, one at a time, beating well after each addition. Beat in pumpkin until well blended. Add contents of jar; stir just until blended. Pour into prepared pan.
3. Bake 50-55 minutes or until toothpick inserted into center comes out clean (mine took 65 minutes, but I had too much liquid in my bread...it came out fine, though). Cool in pan on wire rack 15 minutes. Remove from pan and cool completely on wire rack. Makes 1 loaf.
And here is the finished product:
Aaaaaand, last but not least (and not the least of what I did today), I made vanilla syrup! My mother in law gave me these bottles of syrup that I've been using in my coffee. I knew that once they were gone, I was going to miss them terribly. My coffee has been so yummy lately! So, I looked up how to make syrup. I'm not a big sugar fan, though, so we have no sugar in our house. I wondered if I could make it with splenda? I have heard bad things about splenda, but we have tons of it, so why not use it up, eh? So, I made the syrup just like I would with sugar...twice as much splenda as water, in a pan. The splenda completely dissolved in the water without even heating it. But it seemed rather thin, and had a funky after taste. So I decided to try adding some vegetable glycerine, which is very sweet. It didn't make it any thicker, but it helped with the after taste. I used my homemade vanilla extract (2 tsp), boiled the syrup for a couple minutes to burn off the alcohol, and it is FABULOUS! Sooo much better than the storebought stuff! Here's the finished product:Cheap, easy, SUPER yummy, and easy to store in the bottles I already had. I like that. :-)Have a great day, all!
Monday, March 16, 2009
Wednesday, March 11, 2009
Chili!!!
The last post (the one with the "recipe") was way too long, so rather than add on to it, I figured I'd post a new one. The chili is done! Yippee! We decided to have the chili over baked potatoes with some cheese, and it is GOOOOOOOD. Funny, though...I forgot to add the TVP...oh well, it's still delish!
Aaaaaaaaand, here's the steup! I haven't broken it down yet, but it will make at least six meals.
ETA: Thanks to Casey for letting me know I need to explain what TVP (Textured Vegetable Protein) is. Have you ever seen those "veggie crumbles" in the grocery store freezer section? Morningstar farms has them in a green bag. They are YUMMY! And they are made from TVP. But you can also buy TVP in the bulk section and flavor it yourself.
Aaaaaaaaand, here's the steup! I haven't broken it down yet, but it will make at least six meals.ETA: Thanks to Casey for letting me know I need to explain what TVP (Textured Vegetable Protein) is. Have you ever seen those "veggie crumbles" in the grocery store freezer section? Morningstar farms has them in a green bag. They are YUMMY! And they are made from TVP. But you can also buy TVP in the bulk section and flavor it yourself.
My Crock Pots
Oh my, this is going to be a long one. But it's going to be FUN, too! Ok, a little known fact about moi: I own three crock pots. Yep, three. Here's the story. I wanted a crock pot...oh I don't know, a few years back. When I want something, Jason usually makes sure I end up getting it during the holidays or for my birthday or something. So, when I said I wanted a crock pot, he got me one. I LOVE this crock pot. It's enormous (I think it's the largest size you can find). (I'll add in pics later on in this post...you're going to see two out of the three crock pots today anyway.)
Then, when it looked like my first crock pot's crock was cracking (say that 10 times fast), I asked for a replacement crock. Jason couldn't find one, so he got me a new crock pot like this one (this would be the one I'm not using today).
THEN, I decided I wanted a smaller crock pot because, my goodness, there's only two of us. I love cooking extra and freezing, but it's not always necessary. So, he got me a smaller one.
Now for the real meat of this post. I'm in a very crock-potty mood today, so I decided to throw out some recipes. The first one, Cabbage Steup, is a recipe my bff gave me. She has since found a similar recipe online, but this is her own creation. The second one is a Chili recipe that I kind of mixed and matched from two recipes I found online (years ago...I have no clue where I found them), so it's kinda my own recipe.
Alrighty then, without further ado:
Cabbage Steup (btw, it's kinda like stew, and kinda like soup...)
32 oz. vegetable broth (or chicken broth)
1 medium or large cabbage, chopped
2 - 28 oz cans or 1 - 56 oz can of chunky tomato sauce
28 oz water
14 oz can kidney beans, drained
1 can sliced carrots, drained
1 can whole kernel corn, drained
1 can cut green beans, drained
1 6 oz. can tomato paste
Optional ingredients:
3-4 chicken breasts
3-4 medium/large potatoes
Add broth, cabbage, tomato sauce, and water to a large crock pot (you need the biggest crock pot possible, or two smaller crock pots) (add potatoes and chicken at this time, too). Cook in crock pot until cabbage is 3.4 cooked (looks somewhat transparent). Add remaining ingredients and salt, pepper, garlic, and bay leaves and cook for another 1-2 hours or until cabbage is soft (and chicken and potatoes are cooked).
Now, I personally do it a little differently. I apologize that I didn't get pictures from the beginning, but I didn't think about it until I already had a few ingredients in the pot. So, here's what I did. First, I prefer to not use canned stuff if I don't have to, so I soaked some dry kidney beans over night, and put a couple cups (give or take) in the crock pot. I also have this enormous stockpile of dried vegetables that I like to throw in everything so that I can use it up. I also add an onion. So, here's the cabbage steup that far, along with the first half of the cabbage:
Now it may not look like there's a lot of cabbage in there, but when you add in the second half, it nearly fills up the crock:
I also add raw carrots at the beginning instead of canned (and I'd put in raw corn and green beans, too, if I had them):
And of course, I didn't have tomato sauce (I could have sworn we had a couple cans, but whatever), so I just used 2 cans of diced tomatoes and 2 cans of tomato paste:
I also didn't have any broth, so I used vegetable boillion cubes and added some water. So, once everything is in the crock, mix it up as well as you can without spilling stuff all over (because at this point, it's VERY full), and set it to cook:
Ok, now on to the chili. Since I messed around with this recipe so much, I'm not going to put the actual recipe up, I'm just going to explain what I did. I soaked enough beans last night to make both recipes, so I threw in the beans, dried veggies (the ones I'm using up), a packet of chili seasoning (or you can use cumin, pepper, chili powder, and salt), and one onion before my first picture was taken:
Then I added 2 cans of diced tomatoes:
And some water (about a cup, give or take), mixed it all up, and set it to cook, too:
This recipe could easily be doubled even in my little crock pot...I just keep forgetting to actually do it. Anyway, that's what I spent my morning on. Oh yeah, and making laundry soap (couldn't start the laundry until that was made because *ahem* Jason didn't tell me - again - that we were out of laundry soap *tapping my foot*). Now that dinner is cooking, I've got to get busy! Have a fabulous day!
ETA: I forgot to mention, we're "mostly" vegetarian, so instead of ground beef, I'll be adding TVP to the chili later on. You can add ground beef or whatever meat you want to this. The recipe I used that had ground beef in it was not for the crock pot, so I don't know whether you should add raw ground beef at the beginning, or cook it separately and add it at the end.
Then, when it looked like my first crock pot's crock was cracking (say that 10 times fast), I asked for a replacement crock. Jason couldn't find one, so he got me a new crock pot like this one (this would be the one I'm not using today).
THEN, I decided I wanted a smaller crock pot because, my goodness, there's only two of us. I love cooking extra and freezing, but it's not always necessary. So, he got me a smaller one.
Now for the real meat of this post. I'm in a very crock-potty mood today, so I decided to throw out some recipes. The first one, Cabbage Steup, is a recipe my bff gave me. She has since found a similar recipe online, but this is her own creation. The second one is a Chili recipe that I kind of mixed and matched from two recipes I found online (years ago...I have no clue where I found them), so it's kinda my own recipe.
Alrighty then, without further ado:
Cabbage Steup (btw, it's kinda like stew, and kinda like soup...)
32 oz. vegetable broth (or chicken broth)
1 medium or large cabbage, chopped
2 - 28 oz cans or 1 - 56 oz can of chunky tomato sauce
28 oz water
14 oz can kidney beans, drained
1 can sliced carrots, drained
1 can whole kernel corn, drained
1 can cut green beans, drained
1 6 oz. can tomato paste
Optional ingredients:
3-4 chicken breasts
3-4 medium/large potatoes
Add broth, cabbage, tomato sauce, and water to a large crock pot (you need the biggest crock pot possible, or two smaller crock pots) (add potatoes and chicken at this time, too). Cook in crock pot until cabbage is 3.4 cooked (looks somewhat transparent). Add remaining ingredients and salt, pepper, garlic, and bay leaves and cook for another 1-2 hours or until cabbage is soft (and chicken and potatoes are cooked).
Now, I personally do it a little differently. I apologize that I didn't get pictures from the beginning, but I didn't think about it until I already had a few ingredients in the pot. So, here's what I did. First, I prefer to not use canned stuff if I don't have to, so I soaked some dry kidney beans over night, and put a couple cups (give or take) in the crock pot. I also have this enormous stockpile of dried vegetables that I like to throw in everything so that I can use it up. I also add an onion. So, here's the cabbage steup that far, along with the first half of the cabbage:
Now it may not look like there's a lot of cabbage in there, but when you add in the second half, it nearly fills up the crock:I also add raw carrots at the beginning instead of canned (and I'd put in raw corn and green beans, too, if I had them):And of course, I didn't have tomato sauce (I could have sworn we had a couple cans, but whatever), so I just used 2 cans of diced tomatoes and 2 cans of tomato paste:I also didn't have any broth, so I used vegetable boillion cubes and added some water. So, once everything is in the crock, mix it up as well as you can without spilling stuff all over (because at this point, it's VERY full), and set it to cook:Ok, now on to the chili. Since I messed around with this recipe so much, I'm not going to put the actual recipe up, I'm just going to explain what I did. I soaked enough beans last night to make both recipes, so I threw in the beans, dried veggies (the ones I'm using up), a packet of chili seasoning (or you can use cumin, pepper, chili powder, and salt), and one onion before my first picture was taken:
Then I added 2 cans of diced tomatoes:And some water (about a cup, give or take), mixed it all up, and set it to cook, too:This recipe could easily be doubled even in my little crock pot...I just keep forgetting to actually do it. Anyway, that's what I spent my morning on. Oh yeah, and making laundry soap (couldn't start the laundry until that was made because *ahem* Jason didn't tell me - again - that we were out of laundry soap *tapping my foot*). Now that dinner is cooking, I've got to get busy! Have a fabulous day!ETA: I forgot to mention, we're "mostly" vegetarian, so instead of ground beef, I'll be adding TVP to the chili later on. You can add ground beef or whatever meat you want to this. The recipe I used that had ground beef in it was not for the crock pot, so I don't know whether you should add raw ground beef at the beginning, or cook it separately and add it at the end.
Subscribe to:
Comments (Atom)

